
Preparing the Stone
In order to aid in the production of a successful and stable lithograph, it is important to prepare the stone well, keeping its surface smooth, level and flat. To clean the stone after it has been used for another image, it is necessary to grind it with a levigator and carborundum grit. It is usual to use three grades of grit, working from coarse (about grade 60) through to fine (grade 220) with at least three applications of each. This should be enough to ensure the successful removal of the image and sufficient polishing of the surface. The grit should be liberally applied to the surface and mixed with water to produce a wet paste. The grit is worked over the surface with the levigator, which is rotated and moved around the top of the stone. Take care to levigate all areas of the surface equally – concentrating too much on one area will eventually cause a dip in the stone leading to uneven printing pressure.
When each application of grit breaks down it must be washed away with plenty of water and fresh carborundum of the same grade added. When switching from one grade of grit to a finer one is very important to wash the stone and levigator very carefully, as any grains of the coarser grade can cause circular scratches which will be very prominent at the printing stage. If this occurs the stone will need to be ground again with coarse carborundum. When finished grinding the stone, the edges should be filed to remove any sharp edges and the stone allowed to dry in preparation for drawing.
During this stage the stone should be tested with a straight edge ruler and a calipers to ensure the surface is both smooth and flat. If it is not, corrections can be made by repeated applications of coarse carborundum to any raised areas.
Drawing the Stone
The stone is now ready to be drawn on. A range of professional grade drawing materials are available, such as crayons, pencils and tusches (greasy pigments which can be dissolved in liquid and painted on like an ink wash.) Crayons and pencils typically come in a number of grades from dark and very greasy through to finer, harder grades to allow for a great range of mark-making possibilities. However, since lithography works on the basis that grease and water reject each other, any greasy or oily materials can potentially be used. These might include oil pastels, vaseline, engine grease, oils etc. Other solvent-based materials can be used such as permanent markers, so it is worth experimenting with different materials.
In order to make deletions or corrections to a drawing, it is possible to remove drawn areas with sandpaper or by scraping into the surface with a sharp blade. Also, gum arabic, applied directly to the stone and allowed to dry, will act as a resist to all subsequent drawing. Pencils and crayons can be drawn with as if you were working on paper and should give reliable results. Tusches and other liquid-based washes need some practice and experience to get them to print reliably, and as different stones will react to washes in distinct ways it is preferable to work on the same stones for each image if possible.
Once the image is drawn it should be allowed to sit on the stone for a few hours, or preferably overnight, before further processing. This is to allow the greasy materials to sink into the porous surface and give the strongest possible result.
Etching the Stone
The process of etching the stone chemically fixes the drawing onto the surface and prepares the image for stable printing. Essentially, it enhances the property of the drawn areas to attract the greasy printing ink, and improves the non-drawn areas’ ability to hold water and reject ink, an essential part of the printing process.
Before etching, the stone should be dusted with a coating of fine resin dust, and then talcum powder, applied with a soft brush or pad. This will ensure the drawing doesn’t smudge, and will help the etching solution to do its work and the full range of tones to print.
An etching solution consists of 30ml of gum arabic, into which drops of nitric acid are mixed. The key to successful etching lies in having the appropriate strength of etch applied to the stone – a stronger etch will have more drops of acid. Etching tables are available for various drawing materials for reference, but as a general guide, a weak etch will have 1 to 4 drops, and a strong etch may have up to 16 or 18 drops. Generally, a strong, dark greasy drawing or wash will need a stronger etch, while a delicate, lighter one will require a weaker solution. Experience will tell you what strength of etches to use. It is normal to apply etches of varying strengths to different parts of the same stone as required. In these cases, the etches are prepared and applied separately, working from the weakest to the strongest solutions. Sometimes, for a very fine wash or mark, pure gum with no acid is applied to the stone.
To apply the etch to the stone, it is typically brushed onto the surface with a soft brush, allowed to sit for a few minutes, and then wiped off with a clean lithography sponge. It is good practice to apply a thin layer of pure gum over the entire stone before applying the solution, which hydrates the stone and enhances the effectiveness of the etch. The weakest etch, i.e. the solution with the fewest drops of acid, is always applied over the entire stone. It is also good practice to apply each etch of a given strength twice to give a more stable result. When applying a series of etches of increasing strength, take care to only paint the solution onto the areas that require it. If a strong etch contacts an area of weaker tone, it will have the effect of lightening it at the printing stage. This of course can be used as a way to control the tonal values of the image with a little practice.
After the final etch has been applied, a piece of cheesecloth or a fine cotton rag is used to buff down the image thoroughly, removing as much of the solution as possible. This is important, as during the next stage the drawing must be washed out and any excess gum left on the stone will impede this process. For the most stable results the etch should be left on the stone for a few hours, or ideally overnight.
Rolling Up the Stone
The next stage of the lithography process involves removing the original drawn materials and replacing them with ink, and is normally used to prepare the stone for a second etch which will further stabilise the stone for printing. It also affords the possibility to assess how successful the original etching was, and allows for adjustment to the tonal values of the image by altering the strength of the solutions used in the second etch. It is possible to print the stone at this stage without further etching, and although this may produce satisfactory results the stone will be unlikely to remain stable for large editions.
First, the stone must be washed out with white spirits and a rag to remove the drawing. It is important to remove as much of the drawing as possible at this stage. A small amount of asphaltum is then applied to the stone and rubbed in well with a rag. This highly greasy material will aid in pulling the ink into the drawn areas when rolling up. Next the stone is flooded with water using a lithography sponge to remove the gum arabic layer which was applied during the etch. Ensure all of the gum is removed, causing a lightening of the colour in the non-drawn areas of the stone. Discard the dirty water and prepare a basin of clean water and a clean sponge to keep the stone damp from this point onwards.
Ink should also be prepared at this point and rolled out onto a slab in a thin layer. For this proofing stage, a non-drying roll up ink is often used with a leather roller. Keeping the stone moist by wiping down with a clean, damp sponge, begin rolling the ink over the image until the surface begins to accept ink. It is important to ink all areas of the stone and to vary the direction of rolling to ensure the best coverage of ink over the image. Normally the roller is passed over the stone 6 to 8 times before replenishing the ink from the slab and re-dampening the stone. This is known as one pass. It may take several passes to bring the image up to full strength, and it is always better to bring the tone up slowly with thin ink to ensure greater control.
A lot of control over the strength of the tones in the image can be had from the rolling technique. In general, as well as varying the amount of ink on the roller, more ink is deposited onto the stone if the rolling action is slower. To reduce the ink levels on the image, the roller can be whipped back quickly from the stone in the return direction. Also, if the ink is too loose and inclined to darken the image, a small amount of magnesium carbonate mixed into it will help to stiffen it up.
Assuming the stone isn’t being printed at this point, the image can be assessed and the second etch applied. The steps are exactly the same as described above, except the strengths of the etching solutions may need to be adjusted depending on how the image has rolled up. As a general rule, if the image looks similar to the original drawing, the strengths of the first etch can be maintained. If the image has darkened, a few more drops of acid can be used and if the image is too light, fewer drops can be used. This should have the effect of bringing the image closer to the original drawing for printing.
Printing the Stone
After the second etch has been allowed to sit on the stone for a few hours, the image should be ready for printing. Before starting to print it is a good idea to prepare your paper, ink, sponges and other necessary materials in advance.
The image and gum layer is first washed from the stone as in “Rolling up the Stone” above, and the stone kept damp at all times when applying ink to its surface. Using printing ink rolled thinly on the roller, begin to ink the stone, using 3 to 4 passes. Then, wipe the image down with a sponge to remove any unwanted ink spots and print the image on newsprint. It’s best not to apply any more pressure to the stone than is needed, and a few sheets of newsprint can be used to give some padding. It is normal for the image to build up slowly at first as it works its way up to full strength. It may be necessary to print several proofs on newsprint before the image is strong enough to print on good paper.
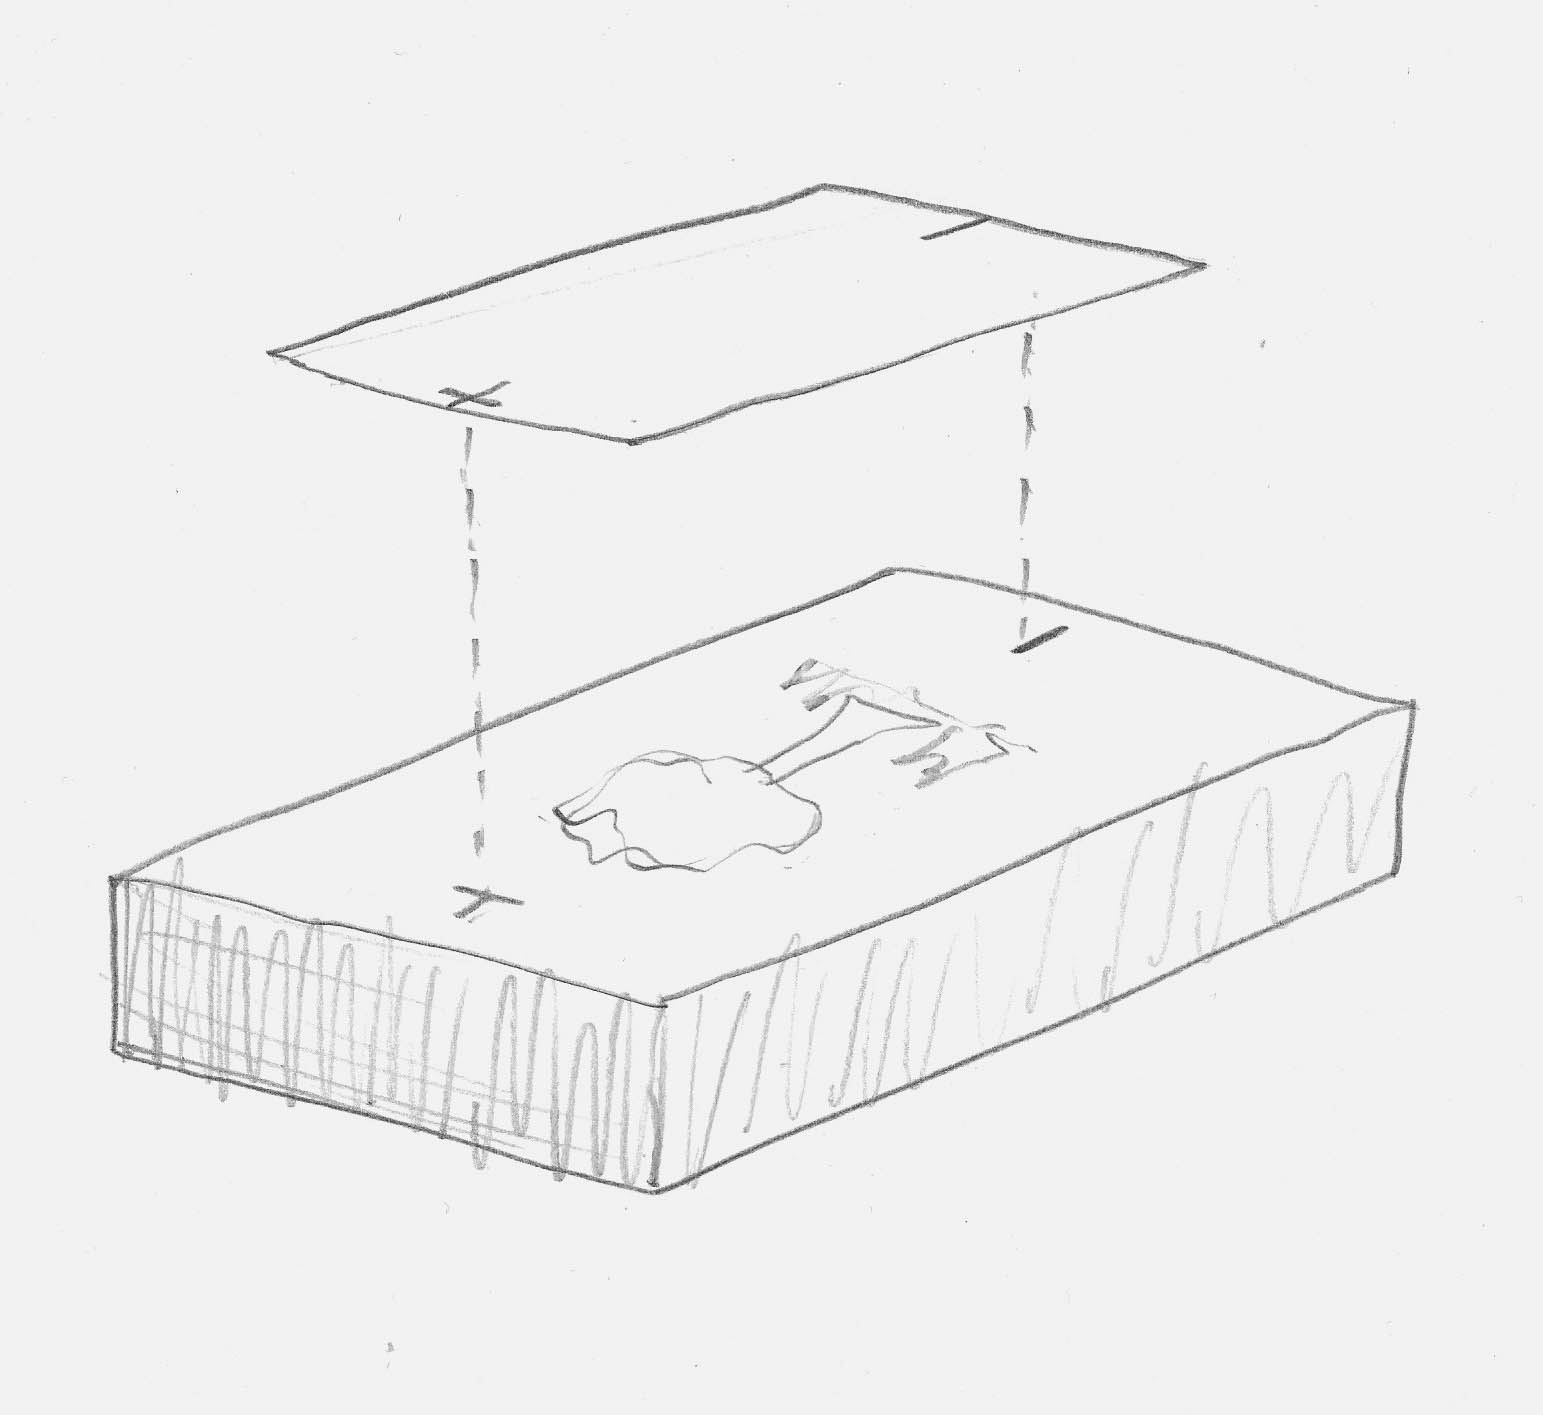
When using good paper, make sure it is prepared in advance with registration marks. The T-bar registration system allows for very accurate registration and will also compensate for the deckle edges found on many handmade papers (see below.)
In order to produce rich prints with a full tonal range, it may be necessary to slightly dampen the sheets of paper before they are printed, or they may be calendared instead. This involves running each sheet at printing pressure through the press without ink to smoothen out the surface. During printing, try to maintain consistency in your inking, while ensuring to roll the stone from several different directions as you work. This will help to achieve a good consistent print run.