An overview of the papermaking process from start to finish;
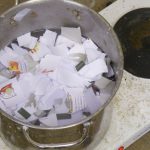
Various materials can be recycled to make paper pulp, including old watercolour or fine art papers, cardboard packaging, copy paper, kitchen roll etc. Make sure materials to be used are not laminated as this will not break down during the processing. To prepare paper or card for pulping it should be torn into small squares (1 to 2 cm in size) and soaked in water for a few hours.
Plant materials can also be used to make pulp, such as grasses, reeds and rushes. If using these use a scissors to cut them into lengths of 1 to 2 cm and soak them.
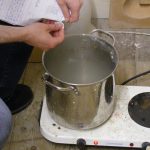
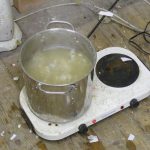
These soaked materials are now boiled in a pan of water to further soften them and wash out unwanted materials such as old sizing and glues that may be present. Normally boiling for an hour or two is sufficient for old papers, while plants will need to be boiled for a longer time. For plants, you can add a pinch of caustic soda to the mixture as well, taking care to use gloves while handling the mixture. This will speed up the process and give smoother results.
Preparing and boiling materials to get them ready for pulping.
After the raw materials have been boiled, They must be washed out using a sieve and plenty of clean water to remove any impurities to prepare them for blending. Take care to use gloves particularly if caustic soda has been used.
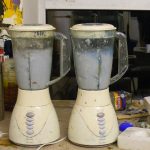
The final stage in the preparation of the pulp is to process it in a household blender. This will separate the fibres that were present in the raw materials and allow them to float freely in the water. Fill the blender with a litre of clean water, and into this place a small handful of the washed pulp. Blend for about 90 seconds for recycled papers. If the pulp isn’t blended for long enough the finished paper may have a clumpy consistency, while blending for too long will cut the fibres to too short a length and the result may be a very weak sheet of paper. Grassy pulps may need to be processed for longer depending on the consistency you want.
If a sizing solution is to be added to the pulp (necessary to prevent the finished paper from absorbing water too readily) it can be put into the blender with the pulp at this stage, or it can be stirred into the solution afterwards. If the paper is to dyed with pigments, it may be necessary to to this before adding the sizing, depending on the particular type of pigments used.
Blending the washed pulp afterwards.
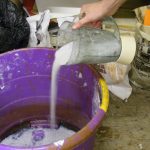
When the blender of pulp has been mixed, tip it into a large bucket or some form of waterproof container which will act as a vat. The solution of pulp is now almost ready for forming sheets, but will currently be too thick for doing so easily. More water should be added to the vat to get a better consistency – usually the volume of liquid should be doubled at least.
Filling a vat with the pulp which will be topped up with clean water.
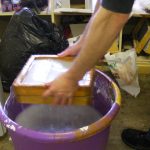
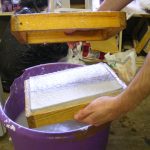
The vat of pulp is now ready to be used to form sheets. For this a mould and deckle is normally used. This consists of two frames, one of which (the mould) has a mesh stretched and glued on one of its sides to catch the paper pulp. With the mesh facing upwards, clasp the mould under the deckle and immerse deep into the vat. While holding in a horizontal position, bring them slowly towards the surface and out of the vat. Allow the water to drain through the mesh, agitating the frames slightly from side to side to distribute the pulp evenly. Stirring the vat beforehand will allow you to catch more pulp inside the deckle. Allow to drain until very little water continues to drip out of the frames. Carefully remove the deckle from the top of the mould.
Forming the sheets with a mould and deckle.
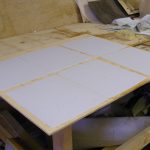
The sheet of wet paper pulp must now be removed from the mesh and placed on a felt. This process is known as couching the pulp. Place a couple of dampened sheets of felt flat onto a table or board. The interfacing used to line and stiffen fabrics is ideal for this, and can be cut into sheets of the desired size, which should be a little bigger than the size of your paper sheets. To remove the paper from the mould, hold the mould upside down, pressing the sheet onto the felt, and then “roll” the mould off the felt again, releasing the pulp. This should be done in one smooth motion – it’s normal to worry that the pulp will fall off the mesh but it shouldn’t if enough water has been drained from it. You can continue to layer more sheets on top of each other to form a stack, separating each piece with a layer of felt to prevent them from sticking together.
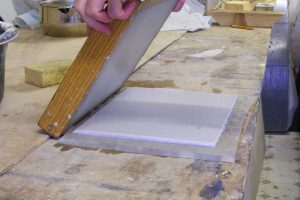
When enough sheets have been formed from the vat, they are ready to be pressed. Pressing flattens out the sheets, making them bind properly together and expels a great deal of the water which is still trapped in the pulp. The sheets can be pressed in a variety of ways, but a bookbinding press is ideal if available. The sheets should be sandwiched between two boards before pressing, and the pressure introduced very gradually to maintain the shape of the sheets. If a press is not available, one can be improvised with two pieces of thick plywood and a couple of large g-clamps. Once the sheets have been pressed, they can be removed from the felts and separated to dry. If they are dried between boards or sheets of blotting paper with some weight on top they will dry very flat.
When disposing of the water from the vats after the sheets have been formed, take care to sieve out any remaining pulp as pulp fibres will easily block sinks and drains.

