All posts by admin

Papermaking Instructional Notes

An overview of the papermaking process from start to finish;


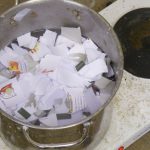
Various materials can be recycled to make paper pulp, including old watercolour or fine art papers, cardboard packaging, copy paper, kitchen roll etc. Make sure materials to be used are not laminated as this will not break down during the processing. To prepare paper or card for pulping it should be torn into small squares (1 to 2 cm in size) and soaked in water for a few hours.

Plant materials can also be used to make pulp, such as grasses, reeds and rushes. If using these use a scissors to cut them into lengths of 1 to 2 cm and soak them.

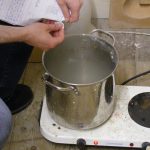
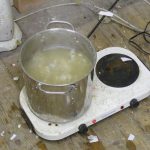
These soaked materials are now boiled in a pan of water to further soften them and wash out unwanted materials such as old sizing and glues that may be present. Normally boiling for an hour or two is sufficient for old papers, while plants will need to be boiled for a longer time. For plants, you can add a pinch of caustic soda to the mixture as well, taking care to use gloves while handling the mixture. This will speed up the process and give smoother results.


Preparing and boiling materials to get them ready for pulping.


After the raw materials have been boiled, They must be washed out using a sieve and plenty of clean water to remove any impurities to prepare them for blending. Take care to use gloves particularly if caustic soda has been used.

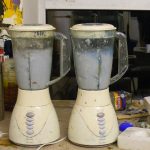
The final stage in the preparation of the pulp is to process it in a household blender. This will separate the fibres that were present in the raw materials and allow them to float freely in the water. Fill the blender with a litre of clean water, and into this place a small handful of the washed pulp. Blend for about 90 seconds for recycled papers. If the pulp isn’t blended for long enough the finished paper may have a clumpy consistency, while blending for too long will cut the fibres to too short a length and the result may be a very weak sheet of paper. Grassy pulps may need to be processed for longer depending on the consistency you want.

If a sizing solution is to be added to the pulp (necessary to prevent the finished paper from absorbing water too readily) it can be put into the blender with the pulp at this stage, or it can be stirred into the solution afterwards. If the paper is to dyed with pigments, it may be necessary to to this before adding the sizing, depending on the particular type of pigments used.


Blending the washed pulp afterwards.


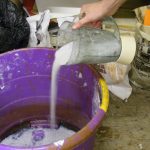
When the blender of pulp has been mixed, tip it into a large bucket or some form of waterproof container which will act as a vat. The solution of pulp is now almost ready for forming sheets, but will currently be too thick for doing so easily. More water should be added to the vat to get a better consistency – usually the volume  of liquid should be doubled at least.


Filling a vat with the pulp which will be topped up with clean water.


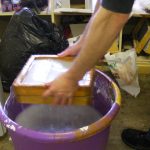
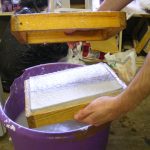
The vat of pulp is now ready to be used to form sheets. For this a mould and deckle is normally used. This consists of two frames, one of which (the mould) has a mesh stretched and glued on one of its sides to catch the paper pulp. With the mesh facing upwards, clasp the mould under the deckle and immerse deep into the vat. While holding in a horizontal position, bring them slowly towards the surface and out of the vat. Allow the water to drain through the mesh, agitating the frames slightly from side to side to distribute the pulp evenly. Stirring the vat beforehand will allow you to catch more pulp inside the deckle. Allow to drain until very little water continues to drip out of the frames. Carefully remove the deckle from the top of the mould.


Forming the sheets with a mould and deckle.


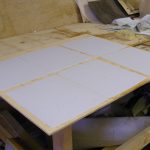
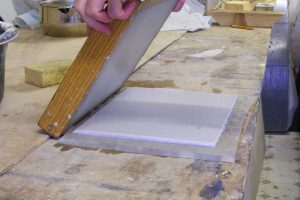
The sheet of wet paper pulp must now be removed from the mesh and placed on a felt. This process is known as couching the pulp. Place a couple of dampened sheets of felt flat onto a table or board. The interfacing used to line and stiffen fabrics is ideal for this, and can be cut into sheets of the desired size, which should be a little bigger than the size of your paper sheets. To remove the paper from the mould, hold the mould upside down, pressing the sheet onto the felt, and then “roll” the mould off the felt again, releasing the pulp. This should be done in one smooth motion – it’s normal to worry that the pulp will fall off the mesh but it shouldn’t if enough water has been drained from it. You can continue to layer more sheets on top of each other to form a stack, separating each piece with a layer of felt to prevent them from sticking together.

Couching the formed sheet onto felts.


When enough sheets have been formed from the vat, they are ready to be pressed. Pressing flattens out the sheets, making them bind properly together and expels a great deal of the water which is still trapped in the pulp. The sheets can be pressed in a variety of ways, but a bookbinding press is ideal if available. The sheets should be sandwiched between two boards before pressing, and the pressure introduced very gradually to maintain the shape of the sheets. If a press is not available, one can be improvised with two pieces of thick plywood and a couple of large g-clamps. Once the sheets have been pressed, they can be removed from the felts and separated to dry. If they are dried between boards or sheets of blotting paper with some weight on top they will dry very flat.


When disposing of the water from the vats after the sheets have been formed, take care to sieve out any remaining pulp as pulp fibres will easily block sinks and drains.

Reflection – collaboration with Corina Duyn

I have known artist and writer Corina Duyn for several years and have long admired her ability as an artist, and particularly her commitment to remaining so productive while having lived with the illness M.E. for many years.

When she approached me with an idea for a puppet-based project “Reflection” I was immediately intrigued. Corina’s concept is to have two identical puppets, one intended to represent a reflection of the other as though in a mirror. While one of the puppets will remain quite stationary, the other will be designed to move and dance, either by being manipulated by a performer or animated through the use of a small motor. The outcome of the project is expected to be a short film, but we are open to the possibility of other forms as well. According to Corina, this piece will explore the duality experienced while living with an illness – the reality of reduced physical mobility contrasting with the complete freedom offered by the mind and the imagination.

While Corina busily works on the two puppets to be featured in the piece, she has asked me to explore the idea of using motors to animate the dancing puppet. We started off by buying a small motor kit from an electronics shop, and I began to experiment with getting it running and seeing what it was capable of.

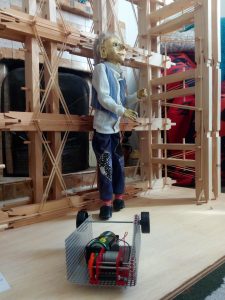
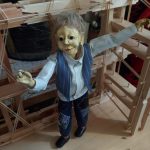
In some early tests, by using the motor together with a combination of small hooks and twine, I was able to get some movement into Jimmy (a puppet Corina had made some years ago, but very similar to the ones she’s now working on.) So far I have been able to animate his arms and upper body at a slow speed. In the future I hope to be able to get a greater range of movement into his arms and also legs to give a more convincing and fluid sense of movement by connecting the motor to different parts of his body. I would also like to explore having different areas of his body move in such a way that they do not necessarily remain in sync with each other, so that the movement isn’t repeated constantly on a loop. This would hopefully make the animation more interesting to observe.


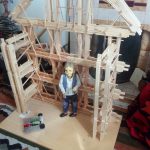
An important issue to address while working on the piece was to find some sort of structure in which I could suspend Jimmy while exploring his movement. To do this I hit upon the idea of resurrecting a modular sculpture I’d made a few years previously, called DLV (Dimensions, Location Variable). This is a “kit” made from several hundred identical interlocking components, used for making a range of artworks, which I’d always intended to use repeatedly in different situations. While initially planning to use it as a temporary measure, it soon became clear that the simple timber and dowelling aesthetics of the piece were a very good match for the materials Corina had used to fashion Jimmy and the cross from which he is usually operated. We are now considering using it in whatever form the project finally takes.

I’m delighted to be working on this project with Corina, and look forward to seeing where it takes us!

Stone Lithography Instructional Notes

Preparing the Stone

In order to aid in the production of a successful and stable lithograph, it is important to prepare the stone well, keeping its surface smooth, level and flat. To clean the stone after it has been used for another image, it is necessary to grind it with a levigator and carborundum grit. It is usual to use three grades of grit, working from coarse (about grade 60) through to fine (grade 220) with at least three applications of each. This should be enough to ensure the successful removal of the image and sufficient polishing of the surface. The grit should be liberally applied to the surface and mixed with water to produce a wet paste. The grit is worked over the surface with the levigator, which is rotated and moved around the top of the stone. Take care to levigate all areas of the surface equally – concentrating too much on one area will eventually cause a dip in the stone leading to uneven printing pressure.

When each application of grit breaks down it must be washed away with plenty of water and fresh carborundum of the same grade added. When switching from one grade of grit to a finer one is very important to wash the stone and levigator very carefully, as any grains of the coarser grade can cause circular scratches which will be very prominent at the printing stage. If this occurs the stone will need to be ground again with coarse carborundum. When finished grinding the stone, the edges should be filed to remove any sharp edges and the stone allowed to dry in preparation for drawing.

During this stage the stone should be tested with a straight edge ruler and a calipers to ensure the surface is both smooth and flat. If  it is not, corrections can be made by repeated applications of coarse carborundum to any raised areas.


Drawing the Stone

The stone is now ready to be drawn on. A range of professional grade drawing materials are available, such as crayons, pencils and tusches (greasy pigments which can be dissolved in liquid and painted on like an ink wash.) Crayons and pencils typically come in a number of grades from dark and very greasy through to finer, harder grades to allow for a great range of mark-making possibilities. However, since lithography works on the basis that grease and water reject each other, any greasy or oily materials can potentially be used. These might include oil pastels, vaseline, engine grease, oils etc. Other solvent-based materials can be used such as permanent markers, so it is worth experimenting with different materials.

In order to make deletions or corrections to a drawing, it is possible to remove drawn areas with sandpaper or by scraping into the surface with a sharp blade. Also, gum arabic, applied directly to the stone and allowed to dry, will act as a resist to all subsequent drawing. Pencils and crayons can be drawn with as if you were working on paper and should give reliable results. Tusches and other liquid-based washes need some practice and experience to get them to print reliably, and as different stones will react to washes in distinct ways it is preferable to work on the same stones for each image if possible.

Once the image is drawn it should be allowed to sit on the stone for a few hours, or preferably overnight, before further processing. This is to allow the greasy materials to sink into the porous surface and give the strongest possible result.


Etching the Stone

The process of etching the stone chemically fixes the drawing onto the surface and prepares the image for stable printing. Essentially, it enhances the property of the drawn areas to attract the greasy printing ink, and improves the non-drawn areas’ ability to hold water and reject ink, an essential part of the printing process.

Before etching, the stone should be dusted with a coating of fine resin dust, and then talcum powder, applied with a soft brush or pad. This will ensure the drawing doesn’t smudge, and will help the etching solution to do its work and the full range of tones to print.

An etching solution consists of 30ml of gum arabic, into which drops of nitric acid are mixed. The key to successful etching lies in having the appropriate strength of etch applied to the stone – a stronger etch will have more drops of acid. Etching tables are available for various drawing materials for reference, but as a general guide, a weak etch will have 1 to 4 drops, and a strong etch may have up to 16 or 18 drops. Generally, a strong, dark greasy drawing or wash will need a stronger etch, while a delicate, lighter one will require a weaker solution. Experience will tell you what strength of etches to use. It is normal to apply etches of varying strengths to different parts of the same stone as required. In these cases, the etches are prepared and applied separately, working from the weakest to the strongest solutions. Sometimes, for a very fine wash or mark, pure gum with no acid is applied to the stone.

To apply the etch to the stone, it is typically brushed onto the surface with a soft brush, allowed to sit for a few minutes, and then wiped off with a clean lithography sponge. It is good practice to apply a thin layer of pure gum over the entire stone before applying the solution, which hydrates the stone and enhances the effectiveness of the etch. The weakest etch, i.e. the solution with the fewest drops of acid, is always applied over the entire stone. It is also good practice to apply each etch of a given strength twice to give a more stable result. When applying a series of etches of increasing strength, take care to only paint the solution onto the areas that require it. If a strong etch contacts an area of weaker tone, it will have the effect of lightening it at the printing stage. This of course can be used as a way to control the tonal values of the image with a little practice.

After the final etch has been applied, a piece of cheesecloth or a fine cotton rag is used to buff down the image thoroughly, removing as much of the solution as possible. This is important, as during the next stage the drawing must be washed out and any excess gum left on the stone will impede this process. For the most stable results the etch should be left on the stone for a few hours, or ideally overnight.


Rolling Up the Stone

The next stage of the lithography process involves removing the original drawn materials and replacing them with ink, and is normally used to prepare the stone for a second etch which will further stabilise the stone for printing. It also affords the possibility to assess how successful the original etching was, and allows for adjustment to the tonal values of the image by altering the strength of the solutions used in the second etch. It is possible to print the stone at this stage without further etching, and although this may produce satisfactory results the stone will be unlikely to remain stable for large editions.

First, the stone must be washed out with white spirits and a rag to remove the drawing.  It is important to remove as much of the drawing as possible at this stage. A small amount of asphaltum is then applied to the stone and rubbed in well with a rag. This highly greasy material will aid in pulling the ink into the drawn areas when rolling up. Next the stone is flooded with water using a lithography sponge to remove the gum arabic layer which was applied during the etch. Ensure all of the gum is removed, causing a lightening of the colour in the non-drawn areas of the stone. Discard the dirty water and prepare a basin of clean water and a clean sponge to keep the stone damp from this point onwards.

Ink should also be prepared at this point and rolled out onto a slab in a thin layer. For this proofing  stage, a non-drying roll up ink is often used with a leather roller. Keeping the stone moist by wiping down with a clean, damp sponge, begin rolling the ink over the image until the surface begins to accept ink. It is important to ink all areas of the stone and to vary the direction of rolling to ensure the best coverage of ink over the image. Normally the roller is passed over the stone 6 to 8 times before replenishing the ink from the slab and re-dampening the stone. This is known as one pass. It may take several passes to bring the image up to full strength, and it is always better to bring the tone up slowly with thin ink to ensure greater control.

A lot of control over the strength of the tones in the image can be had from the rolling technique. In general, as well as varying the amount of ink on the roller, more ink is deposited onto the stone if the rolling action is slower. To reduce the ink levels on the image, the roller can be whipped back quickly from the stone in the return direction. Also, if the ink is too loose and inclined to darken the image, a small amount of magnesium carbonate mixed into it will help to stiffen it up.

Assuming the stone isn’t being printed at this point, the image can be assessed and the second etch applied. The steps are exactly the same as described above, except the strengths of the etching solutions may need to be adjusted depending on how the image has rolled up. As a general rule, if the image looks similar to the original drawing, the strengths of the first etch can be maintained. If the image has darkened, a few more drops of acid can be used and if the image is too light, fewer drops can be used. This should have the effect of bringing the image closer to the original drawing for printing.


Printing the Stone

After the second etch has been allowed to sit on the stone for a few hours, the image should be ready for printing. Before starting to print it is a good idea to prepare your paper, ink, sponges and other necessary materials in advance.

The image and gum layer is first washed from the stone as in “Rolling up the Stone” above, and the stone kept damp at all times when applying ink to its surface. Using printing ink rolled thinly on the roller, begin to ink the stone, using 3 to 4 passes. Then, wipe the image down with a sponge to remove any unwanted ink spots and print the image on newsprint. It’s best not to apply any more pressure to the stone than is needed, and a few sheets of newsprint can be used to give some padding. It is normal for the image to build up slowly at first as it works its way up to full strength. It may be necessary to print several proofs on newsprint before the image is strong enough to print on good paper.

When using good paper, make sure it is prepared in advance with registration marks. The T-bar registration system allows for very accurate registration and will also compensate for the deckle edges found on many handmade papers (see below.)
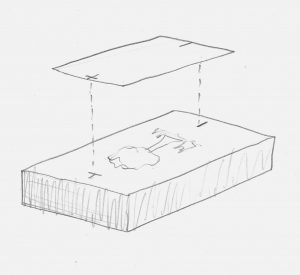
 

In order to produce rich prints with a full tonal range, it may be necessary to slightly dampen the sheets of paper before they are printed, or they may be calendared instead. This involves running each sheet at printing pressure through the press without ink to smoothen out the surface. During printing, try to maintain consistency in your inking, while ensuring to roll the stone from several different directions as you work. This will help to achieve a good consistent print run.


ArtMovement

ArtMovement is an interactive educational resource designed to introduce some key ideas behind abstract art, a type of art where there is no attempt to depict people, places or things, and is free from visual references to the natural world.

This website, developed as part of my MA in Digital Arts & Humanities in University College Cork, allows you to interact with and make your own versions of important abstract works by some famous artists from the twentieth century.

mainbanner

Please visit the site here, and then come back and leave some feedback or suggestions!

A fully illustrated dissertation, detailing the research process and production of the site is available here: supplementing-fine-art-education-with-digital-interactivity

Collograph Instructional Notes

A collograph is a process which allows the artist to get very textured, tactile, almost sculptural results. It can give very varied imagery and is capable of being printed in large editions if well made. It is essentially a collage which has been sealed with a thin coating of shellac for durability and is then inked up and printed.

Plates are usually made from from stiff card or thin hardboard. Woodglue or PVA is used to stick objects onto the surface to make up the image. An endless variety of things can be used with almost any texture as long as they don’t stand more than about 2mm higher than the surface ot the plate. Any higher will cause difficulties at the printing stage. Wool, dried foliage, lace, textured wallpaper and fabrics are all examples of objects that can be used. Painterly marks can be made by applying modelling paste with a brush and working into it. Tile adhesive is a good substitute for this. When the plate is finished it must be allowed to dry thoroughly.

Next, a layer of shellac is applied over the entire plate with a brush. Button polish, French polish etc work well as they are shellac based. If the surface of the plate is porous, a couple of coats may be needed in areas which you want to wipe clean of ink while printing. The plate is left again to dry thoroughly.

Etching ink is used to ink up the plate. It is best applied with a brush over the entire plate to work it into all the recesses of the plate. A small paint roller is also ideal. Most the ink is now removed as with a drypoint. A cotton rag is best to do this though scrim may also be used. Every collograph is different and it takes practice and often several attempts to get a satisfactory print. You need to experiment with different ways of wiping and settle on one which works.

The plate is printed as before but more care must be taken with the printing press this time. Get help if you are unsure how to set the press up. The pressure will need to be loosened and thick blankets used to accommodate the textures and thicker plate. Sometimes it’s preferable to use foam rubber instead of blankets to protect the equipment. A very durable printing paper must be used as the paper will be stressed more than in other processes.

Drypoint Instructional Notes

Drypoint is an intaglio process, like etching or engraving. This means that the image is formed by ink which lies at the bottom of a groove, as opposed to a relief print (lino or woodblock) where the ink lies on the upper surface of the plate. Drypoint can be done on soft sheet metals such as zinc or copper and also on acetate.

Essentially, a drypoint is made by scaping into and abrading the smooth surface of the plate. Linear work is made with a scriber, a sharp needle-like pointed tool which is drawn over the surface by hand with some pressure. This produces a groove and also forms a ragged burr along the line, which when later inked produces the characteristic soft, or “furry” printed line. The scriber is the most common tool but other types of mark can be made. Sandpaper, wire brushes or steel wool will make broad areas of tone with different qualities.

When the image is prepared, the plate must be inked up. To do this etching ink must be used. A small card or rubber squeegee is used to draw some ink over the entire surface of the plate, ensuring the ink is forced down into all the grooves. A piece of soft scrim or tarlatan is then used to remove most of the ink from the surface. This should be formed into a rounded pad and run firmly over the surface of the plate. The ink should stay in the worked areas of the plate. Further ink can be removed with a piece of flat tissue. The artist often chooses not to remove all the tone from the non worked areas of the plate to give a more varied, rich image.

The plate is then printed in exactly the same way as for a monoprint. A small edition can be printed from a drypoint. The ink must be applied and wiped again each time.

Monoprint Instructional Notes

The monoprint is a very versatile and immediate form of printmaking, characterised by the fact that you produce individual, unique prints as opposed to an edition of identical prints. A monoprint can be made on several different types of plates. Sheet metals such as copper or steel are common, but a sheet of thick acetate will also work well.

There are many approaches to making a monoprint. The most common is to roll a thin, even layer of ink onto the plate first and use various tools to remove areas of the ink, which will form white areas on the finished image. The plate is usually secured to an inking surface first around the edges with masking tape. Etching or relief ink is then rolled onto an inking slab with a good quality roller. The ink should be rolled out thinly and evenly. The inked roller is then gently run over the plate to transfer the ink. It can be passed several times to ensure an even coating of ink.

You can now “draw” into the ink to remove parts of it. Many tools are useful for this and you can experiment with improvising your own. Cocktail sticks are good for linear work and crosshatching. Rags and cotton buds work well for for larger open areas. Textured objects can be pressed into the ink to leave a distinctive mark. It’s possible ro get good control over a large range of tonal values in the image. The ink will take many hours to dry so as much time can be taken as you need.

When the drawing is finished the plate is ready for printing. This should be done on an etching press with a good quality printmaking paper. The plate is placed ink side up on the bed of the press, and the paper, which should be dampened and blotted, is placed on top. The blankets should be carefully placed over the plate and smoothed out. Be careful that your hands are clean when handling the blankets as they are very expensive. The press is then wound all the way through and the finished print removed from the plate and placed on a drying rack.

The plate can now be cleaned and used again. If the plate is not cleaned at this stage, a ghost image will remain which may be visible on the next image which can be interesting to exploit. An interesting variation on this technique is to roll out several different colours which can all be rolled onto various areas of the plate at different times. If extender base is added to the ink beforehand, the colours will be transparent and where they overlap many more colours will occur. You can experiment with rolling colours through paper stencils and objects like string etc for all sorts of effects. It is also possible to paint thin layers of ink directly onto the plate with a brush.